Showing posts with label Chinese Festivals. Show all posts

Tuesday, February 07, 2017

CNY Snack : Peanut filled pockets { Kok Chai }

We're 11th day into Chinese New Year but these deep-fried snacks had finished long ago! :D

These turned out as I remembered, crispy with sweet peanut filling. I couldn't stop munching on them.

Kok Chai

Recipe via Malaysian Chinese Kitchen
serves :  32 mini puffs
Ingredients

For dough
300g all-purpose flour 
0.5 tsp salt  
120ml vegetable oil 
160ml water
For Peanut Filling
½ cup (75g) raw peanuts 
2 tbsp (18g) sesame seeds  
¼ cup (53g) sugar
  • Instructions
    Filling
    1. Toast peanuts in a small fry pan over medium heat for 3 to 4 minutes until lightly brown. Remove and allow peanuts to cool. Coarsely chop or grind peanuts.
    2. Toast sesame seeds in the same pan for 1 to 2 minutes until lightly brown.
    3. Combine peanuts, sesame seeds, and sugar in a medium bowl. Mix well and set aside.
    Dough
    1. Combine all-purpose flour (rice flour, if usinand salt in a large bowl. Make a well in the center. Pour vegetable oil into the well. Mix with a spatula. Slowly add water a little at a time to form a soft, non-sticky dough. You may or may not require the full ⅓ cup (80ml) water.
    2. Remove the dough from the bowl and knead on a clean work surface for 3 to 4 minutes. Form dough into a ball and place it back into the bowl. Cover with a towel and allow dough to rest for 10 minutes.
    3. Remove dough from the bowl and shape into a cylinder about 12 inches long. Cut dough into 16 equal size pieces.
    Forming the Mini Puffs
    1. Take a piece of dough and shape it into a circle of about 2½ inches in diameter by rotating and flattening the edges. Place a teaspoon of filling in the center.
    2. Fold the dough into a semi circle. Seal by pressing and pleating the edges together. Repeat with the remaining pieces of dough.
    Frying the Mini Puffs
    1. Heat about an inch of vegetable oil in a wok to fry everything at one go or a small saucepan to fry in batches.
    2. Deep fry mini puffs over medium low heat for 4 to 5 minutes or until golden brown. Remove and allow mini puffs to drain in a metal strainer.
    3. Allow kok chai (mini peanut puffto cool completely before storing in air tight containers for up to 2 weeks.
     

Wednesday, February 03, 2016

Chinese New Year Baking : Almond London Cookies

Chinese New Year is once again around the corner (February 8th)! For this year, I thought aside from the staple pineapple tart, I should try my hand at another favourite cookies for the festival. When I saw a recipe for Almond London Cookies during my blog surfing, I knew I want to make these. These did not originate from London and I have no idea why this cookies exists in Malaysia. The cookie is basically a toasted almond wrapped with short cookie dough, bake lightly, then dipped into melted chocolate and finish off with a sprinkle of chopped/nibbed almonds.

For step-by-step tutorial, please go to Nasi Lemak Lover.


Almond London Cookies
Source : Nasi Lemak Lover (linked above)


150g whole almonds

30g nibbed almonds


170g butter (salted)

60g icing sugar, sifted

20g egg yolk (used 1 yolk)

300g cake flour (used plain flour)


300g chocolate

Method

  1. Toast whole almonds in oven at 180°c for 13-15mins, and toast nibbed almonds at 180°c for 1-2mins. Set aside to let it cool completely before use.
  2. Cream butter and icing sugar till light and pale.
  3. Add in egg yolk, beat well to combine.
  4. Add in cake flour, mix until it come together to form soft dought. Do not over work it.
  5. To weight dough 6g each, wrap up a whole almond, and shape into oval shape.
  6. Bake cookies at 160°c (fan forced) for 15mins or until golden brown, set aside to cool completely.
  7. Melt chocolate over double boiler or microwave oven. Dip cookie in melted chocolate. Use a small fork, transfer coated cookie into a mini paper cup.
  8. Sprinkle some toasted nibbed almonds on top. Chill in the fridge (~10mins) to set the chocolate before storing in air-tight container. Store in cool place to prevent chocolate from melting.

Monday, September 28, 2015

Spiral moon cake

On mid-autumn festival, it is tradition to share and consume moon cakes for the Chinese and Vietnamese community. Different Chinese provinces have different types of moon cakes. For this year, I am attempting the Teochew spiral/swirl moon cake.
After 2 attempts at this spiral pastry technique, as you can see, it was unsuccessful. My oil dough was crumbly and I wasn't sure how to remedy it. Add more oil to bring it together? I'll definitely have to try to do a better job perfecting this technique by the next mid-autumn festival!

Notes:-
1) I am inserting the exact texts from both links as mentioned below for my own future reference.
2) I have halved the recipe for the dough which makes about 16 medium-size mooncakes
3) I have made the full custard recipe; which is sufficient.
4) To make egg custard filling ahead to let it cool before preparing the dough part.

Spiral moon cake
For the pastry (recipe via House of Annie )

Ingredients:
Water Dough (A)
200g unbleached all-purpose flour
28g icing sugar
pinch of salt
80g cold butter
80g water
Oil Dough (B)
180g unbleached all-purpose flour
pinch of salt
90g oil (I use canola)
½ tsp pandan essence (sub. with almond extract)

Method:
1. For the water dough, sift flour, sugar and salt. Then cut butter into flour mixture using fingertips or pastry blender until mixture resembles breadcrumbs. Add in water and mix to form a soft, non-sticky dough. If it is sticky, you will need to add a bit more flour to get it to be the right texture. You should be able to form a soft ball that won’t stick to your hands. You don’t have to knead it. Cover and set aside to rest for 20 mins.
2. For the oil dough, sift flour and salt. Then, make a well in the centre of the flour and add in oil and pandan essence. Draw in the flour from the sides and mix to form a soft even coloured dough (same thing here, if it’s too sticky, add more dough till you form a soft ball that doesn’t stick to your hands). Do not over-mix. Cover and set aside for 20 mins.

To assemble and bake:
3. Preheat oven to 185 C or 350 F.
4. Divide A and B into 10 equal balls.

5. Taking one piece of (A), flatten and wrap (B) in it. Pinch to seal edges.
6. With the sealed side facing up, roll into a rectangle.
7. Roll up like a snail to form a ‘cylinder’, turn the cylinder 90 degrees, with the end facing up.
8. Roll again into a long thin strip.
9. Using a sharp knife or a pastry cutter, cut the cylinder in the middle into two pieces.
10. With the cut side facing down, flatten the dough, making the edges slightly thinner than the centre. I tend to leave a little hump in the center so that when the filling is wrapped around the pastry, the dough will be evenly thick all around (looks like a Mexican sombrero).
11. Wrap the filling and pinch to seal. Try not to ‘tug/pull’ too hard, otherwise the layers will tear. Best to flatten the dough larger than smaller so it’s easier to pinch. And when you pinch, you will find that the bottom looks ugly—don’t worry about it.


For Egg Custard filling (via MaomaoMom)
3 extra large egg yolks,
½ cup sugar (105g)
1/3 cup+1 tbsp milk (88g)
3 tbsp all purpose flour (34g)
(B)
2.5 tbsp dry milk powder (14g)
2.5 tbsp butter (35g)

1) Place all ingredients (A) in a medium size microwave safe bowl, whisk well with a fork-
2) Add in the same bowl, all ingredients (B)
3) Place the bowl in the microwave , heat on high for 40 seconds. Stir the content and then heat for 30 seconds, reheat with 20 second intervals until fully cooked. Let it cool then divide into 12 equal portions. Form into balls with both palms then set aside and continue to start the mooncake dough

Saturday, August 29, 2015

Ang Ku Kuih { 紅龜粿 / Red tortoise cake }


Red Tortoise cake symbolises longevity in the Chinese culture. These soft and chewy red dumplings are therefore popularly served on the occasions of birthdays. To learn more, read the entry on wiki

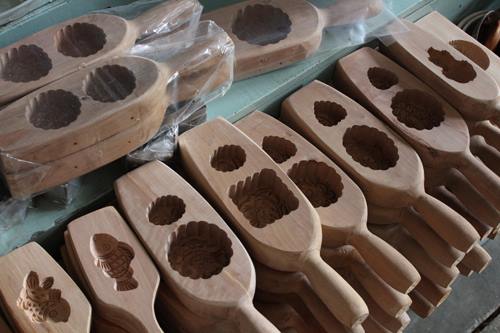
Traditionally the distinct shape of this dumpling is achieved using wooden moulds;  of course, in this day and age, plastic moulds are available too.


And since I did not have the proper moulds, I have used my rose moulds for my cake (don't laugh :D)


Next, let's talk about the fillings. Most of the time these dumplings come with sweet mung beans paste. There are other varieties like sweet coconut and peanuts filling . etc.

Whatever the shapes, I am satisfied with the recipes used in making this cake. For my future reference I have included the recipes as follow :-

Ang Ku Kuih

Ingredients


Sweet Potato Dough
 
300gm sweet potato, sliced
200gm glutinous rice flour
1 tbsp rice flour
2 tbsp sugar
3 tbsp rice bran oil
180ml warm water 
Peanut filling 
via Peng's kitchen
 
150gm prepacked grounded peanuts (no salt, sugar added) 
1 tbsp toasted white sesame seeds 
50gm fine sugar 
1 tbsp oil 
2 tbsp water

Method
  1. Steam sweet potato until soft, for about 25 mins.
  2. Use a fork, mash the cooked sweet potatoes till smooth. Add in glutinous rice flour, rice flour, sugar and oil. Gradually add in water and knead till dough is smooth and pliable. Cover with damp cloth and rest for 30mins.
  3. Shape into 30gm small ball.
  4. Meanwhile, get the peanut filling ready by combining all ingredients in a mixing bowl and mix thoroughly. Mixture should not be crumbly and dry. Shape mixture into small balls weighing approx. 18gm each. 
  5. To shape dumpling
    1. Grease the mould  (for plastic mould) by brushing it with some rice bran oil.
    2. Flatten the sweet potato ball, place a piece of filling in the centre. Cover and seal the edge. Shape into a round ball.
    3. Place the ball into the mould, press down evenly, knock out and place on a greased banana leaf.
    4. Place the dumplings on a steaming tray and steam over medium heat for 10 mins. Turn off flame and grease the surface with some rice bran oil. 
     

Thursday, February 19, 2015

Steamed fish fillets, surimi with glass noodles

Happy Lunar New Year!
I have this carp fillets sitting in the freezer and since I'm unfamiliar with this fish, I was wondering what to cook with it. My thought process was, ok nothing too complicated like frying and too much effort since I'm not sure ..hahaa. So, let's just steam it in garlic, soy, shaosing wine and oil. Simple enough

Steamed carp fish fillets , surimi with glass noodles
Inspired by Thai steamed prawns like this one by The Woks of Life

Ingredients
350gm fish fillets
100gm glass noodles, soaked in warm water for 10-15 mins. until softened
Surimi sticks, imitation crab meat

seasoning
salt, to taste
2 cloves of garlic, chopped finely
oil for sauté
soy sauce, to taste
sugar, to taste
water, not too much
a dash of shaoxing wine (I've substitute with white wine)

Garnishing
Spring onions, green only
Coriander / Parsley leaves

Preparations:-
1) First prep. glass noodles as mentioned above. Set aside. You can do this in advance and keep in the fridge until you need it.
2) Start by heating water in your steamer. Meanwhile, on a plate, big enough for steamer. Lay the soaked glass noodles evenly. Then place the fish fillets/surimi sticks on top. Sprinkle salt over the fish, to taste
3) In a jar, mix together soy sauce, sugar, water and dash of shaoxing wine. Pour over the fish and glass noodles.
4) Sauté finely chopped garlic in oil, don't burn it.When ready pour all over fish and glass noodles.
5) When water is boiling in steamer, place the fish platter into steamer and steam for 10 mins. After 10 mins. check for doneness. If not continue to steam for another 5 and check again until it is ready.
6) Serve immediately garnished with spring onions and coriander/parsley.

Sunday, February 15, 2015

Homemade Yee Sang / Yusheng


To understand what this is all about , please visit wiki

Homemade Yee Sang / Yusheng

Ingredients
carrots, julienned
daikon, julienned (I've used local white radish)
cucumber, julienned
pomelo segments then into pieces (I've substitute with grapefruits) 
+ and other crispy vegetables to your liking
raw salmon (I've used smoked)
friend wonton skin (I've homemade based on this recipe by kitchen simplicity  )

Garnish
pinch of 5-spice powder
pince of white pepper


pickled Japanese ginger (I've made my own by shred ginger finely+water+brown sugar+salt+vinegar)

Salad dressing
Plum sauce (I've used apricot jam)
sesame oil
1 lime juice
pickling juice from ginger

Methods :-
1) Prep. the ingredients the vegetables and fruit. Put the prepped veg., pomelo, fried wonton skin and salmon in a bowl or arrange nicely on a plate. Sprinkle on the seasoning. Mix all the salad dressing ingredients together. Drizzle salad dressing all over the bowl/plate. Check seasoning, adjust if need to. Mix well and serve.

Saturday, September 06, 2014

Mixed Nuts Mookcake (need to let it sit for 2 days)


Pardon the indelicate looking mooncakes :D If you couldn't tell, they were supposed to be rose shape! For a while, it looked great until I egg-washed it and return it to the oven for the second bake.
Never mind the shape, because I am very happy with the results seeing that this is my first ever batch of baked mooncakes :) As highlighted in the title, after baking these need to sit for two days in a container before the date of serving.

As per usual, I've combined 2 recipes for this bake. Here are the links and I suggest you go direct to the links for detailed tutorials as the texts below are mainly for my future reference.

Mixed Nuts Mooncake

Ingredients

For the pastry
via Kirbie's Cravings

100 grams all purpose flour
60 grams golden syrup (I used Honey)
1/2 tsp alkaline water (forgotten to get this at the store, so I've mix a little water with baking soda)
28 grams vegetable oil
1 egg (for eggwash)

1. In a large bowl, mix the golden syrup, alkaline water and oil. Sift in the flour and stir until all ingredients mixed. Gently knead the dough with hands until it comes together. Cover bowl with plastic wrap and let dough rest for 40 minutes. *Note : 20 mins. into resting time, start pre-heating the oven at 180°c/350°F/Gas4.
2. Take 35 grams of dough, roll into a ball, then flatten with a rolling pin. Roll until dough is very thin and big enough to wrap around the 65 gram of filling. Take 65 gram of filling, make into a ball and put in the center of the dough. Wrap dough around the filling until it is a thin layer covering the entire filling, and seal dough around filling. You may need to roll and maneuver the dough a little to completely cover the filling. One side of your dough ball will be somewhat lumpy from connecting the ends together. The other side should be smooth.
3. Place mooncakes on a baking sheet lined with parchment paper or silpat mat, spacing about 2 inches apart. Bake for about 20-25 minutes. About five minutes before mooncakes are ready, remove and quickly brush the mooncake tops with egg wash. Place back in oven and bake until golden brown, about 5-10 minutes.
4. Let mooncakes cool. Place in container and let sit for about 2 days. This will allow the mooncake skin to soften and become darker and developer a shiny exterior from the oils being released.


For the filling
via youtube  Helena's Recipes

Ingredients (makes 4x200g cakes; or 10x100g, or 8x150g cakes)

*For the filling*
150g mixed nuts, roughly chopped
100g candied lime peel, roughly chopped
100g candied orange peel, roughly chopped
50g ginger jam
150g Chinese sausages, fat rendered and diced
4 tbsp sesame seeds
1 tsp sesame oil
3 tbsp cooked glutinous rice flour
3 tbsp simple/corn syrup

Since I couldn't exactly find all items listed in the filling above, mine consist of these :-

Monday, March 04, 2013

Pineapple Tart

recipe coming soon..I need recall which recipe and filling did I use..

update 28/01/2015 :- another post on pineapple "tarts" is up

Monday, March 01, 2010

Homemade Chinese Pork Jerky (Bak kwa) 肉乾

Wow! Homemade Pork jerky needs only 6 ingredients!
If you cook Asian food at home, my guess is you'd already have 5 of the 6 ingredients in your pantry.

The ingredients are :-
1.Ground pork 2.Light soy sauce 3.Dark soy sauce 4. Fish sauce 5. Cooking wine (I used white wine) 6.Sugar


For the exact recipe check at Little corner of Mine


Ingredients:
450gm minced meat, with some fats
1-1/2 tbsp fish sauce
1 tbsp dark soy sauce
1 tbsp light soy sauce
1 tbsp cooking wine
1/2 cup sugar


Method:
Pre-heat oven at 125°c.

Put minced meat in a big bowl. Add in the seasoning. Use Chopsticks and stir in one direction until minced meat becomes gluey.

Put some gluey minced meat on a *parchment paper. Cover with a big cling wrap (I think plastic sheet is better) and use a roller to roll the minced meat to 2mm thick. (*Do not use aluminum foil as it will stick!)

Put the parchment paper with minced meat, on a baking tray.

Bake in preheated oven at 125°c for 20 minutes. **After that, increase the temperature to 180°c and bake for about 20-30 minutes. Keep a close watch, as it burns easily at this stage.

Cooled and cut into pieces.
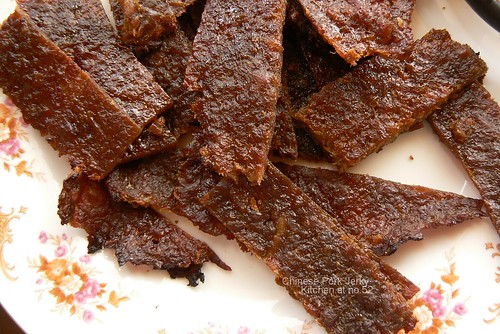
Jerky all stripped and ready to be devour! You may also make a sandwich with these meat garnish with cucumber

AddThis Social Bookmark Button

Wednesday, October 31, 2007

Howdy!

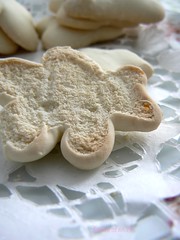
Say hi! to my bangkit bears :)

Yes, those cuties are kuih bangkit ; a type of chinese cookies made from tapioca flour. Auchan was having a chinese kitchen promotion and brought in lots of ingredients which normally not available on their shelves. We made a trip there last weekend so that I could finally stock sesame oil and hoisin sauce...woohoo! Then I was ecstatic when I saw tapioca flour!!! Got to have 'em , don't know what to do with them (never used it before *blush*) , but got to have it!

Next, of course the drill is to search for a recipe. Found quite a number of interesting use for the flour; however, I think the one from Little Corner Of Mine was the easiest, plus she had included useful tips to obtain the right texture for the cookies.

The tips work superbly! The slightly browned base gives a smokey (not burnt!) taste first when popped into the mouth and it just melts in the mouth ...mmmm . How fun to see the initially skinny bears gained weight (raised) after coming out of the oven :D


Sunday, July 01, 2007

Peanut cookies


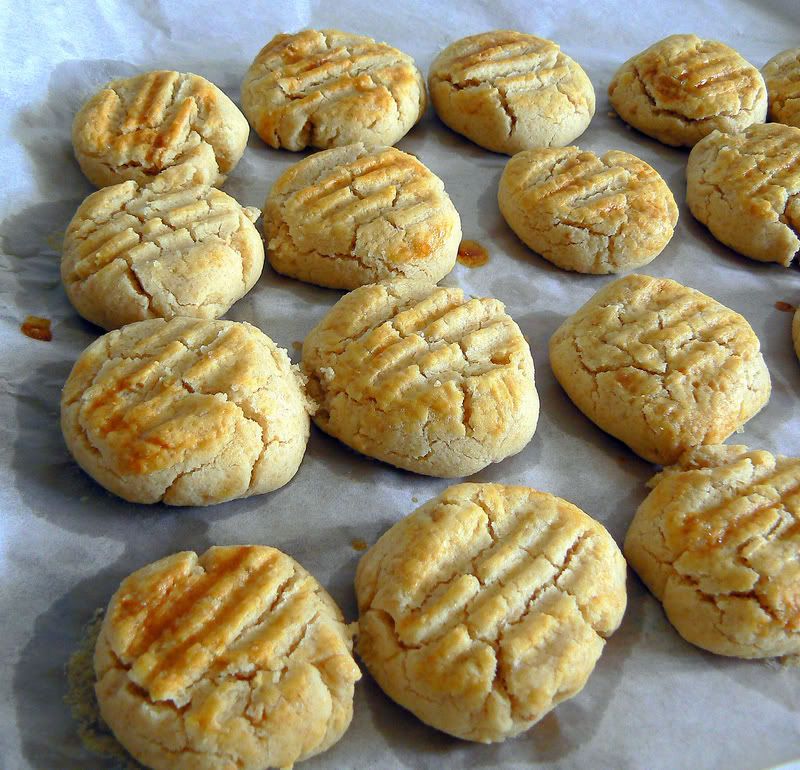
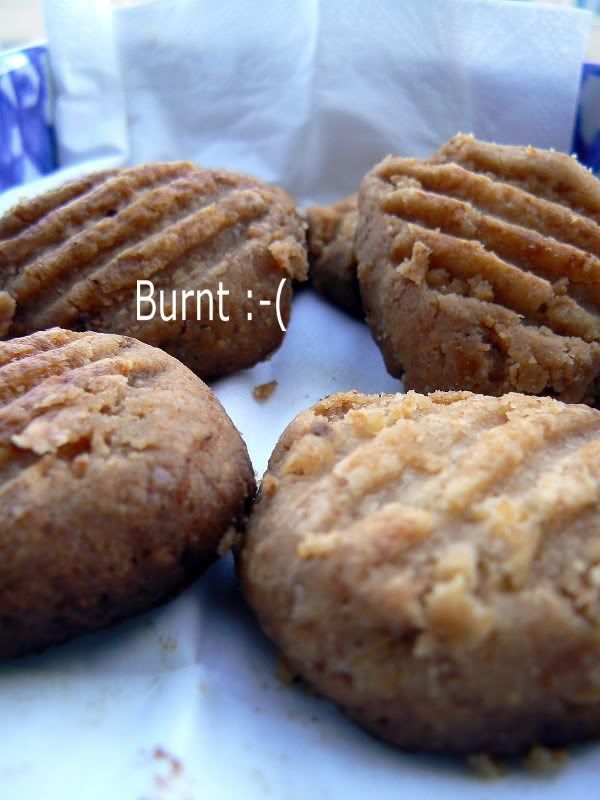
Lately, all I could think about is food!! It doesnt help that there're so many food blogs offering easy recipes. Like this peanut cookies, preparation took me about 30 mins. only.
The first batch was burnt but guess what? I ate the not-too-burnt ones and I'm hooked! So, I baked it again the next day since it's doesnt require too many ingredients and its ready in a jiffy.

.
Verdict : One by one they melt in the mouth..oh, very addictive! You should really try it :)
.
Note : First trial the cookies weren't sweet enough. So, i've increased to 1/3 cup of sugar following the recipe of the link below
.
Peanuts cookies click here for recipe
source : Little corner of mine


(A)
1 1/3 cup unbleached all-purpose flour/ plain flour
1/2 tsp. baking powder
1/2 tsp. baking soda
(B)
1/4 cup sugar (or icing sugar for more melt in the mouth texture)
80g ground coarsed roasted/toasted peanuts
(C)
1/3 cup + 2 Tbp. canola oil

1 egg, beaten for egg wash

Method:

1. Sift (A) into a bowl.
2. Add (B), mix well.
3. Add (C), stir with a fork, the mixture will be crumbly.
4. Use your hands, scoop up the mixture and press it into balls. Place on parchment paper lined cookie sheet.
5. Glaze the peanut cookies with egg wash.
6. Bake at preheated 350'F oven for 20 minutes. 
Showing posts with label Chinese Festivals. Show all posts

Tuesday, February 07, 2017

CNY Snack : Peanut filled pockets { Kok Chai }

We're 11th day into Chinese New Year but these deep-fried snacks had finished long ago! :D

These turned out as I remembered, crispy with sweet peanut filling. I couldn't stop munching on them.

Kok Chai

Recipe via Malaysian Chinese Kitchen
serves :  32 mini puffs
Ingredients

For dough
300g all-purpose flour 
0.5 tsp salt  
120ml vegetable oil 
160ml water
For Peanut Filling
½ cup (75g) raw peanuts 
2 tbsp (18g) sesame seeds  
¼ cup (53g) sugar
  • Instructions
    Filling
    1. Toast peanuts in a small fry pan over medium heat for 3 to 4 minutes until lightly brown. Remove and allow peanuts to cool. Coarsely chop or grind peanuts.
    2. Toast sesame seeds in the same pan for 1 to 2 minutes until lightly brown.
    3. Combine peanuts, sesame seeds, and sugar in a medium bowl. Mix well and set aside.
    Dough
    1. Combine all-purpose flour (rice flour, if usinand salt in a large bowl. Make a well in the center. Pour vegetable oil into the well. Mix with a spatula. Slowly add water a little at a time to form a soft, non-sticky dough. You may or may not require the full ⅓ cup (80ml) water.
    2. Remove the dough from the bowl and knead on a clean work surface for 3 to 4 minutes. Form dough into a ball and place it back into the bowl. Cover with a towel and allow dough to rest for 10 minutes.
    3. Remove dough from the bowl and shape into a cylinder about 12 inches long. Cut dough into 16 equal size pieces.
    Forming the Mini Puffs
    1. Take a piece of dough and shape it into a circle of about 2½ inches in diameter by rotating and flattening the edges. Place a teaspoon of filling in the center.
    2. Fold the dough into a semi circle. Seal by pressing and pleating the edges together. Repeat with the remaining pieces of dough.
    Frying the Mini Puffs
    1. Heat about an inch of vegetable oil in a wok to fry everything at one go or a small saucepan to fry in batches.
    2. Deep fry mini puffs over medium low heat for 4 to 5 minutes or until golden brown. Remove and allow mini puffs to drain in a metal strainer.
    3. Allow kok chai (mini peanut puffto cool completely before storing in air tight containers for up to 2 weeks.
     

Wednesday, February 03, 2016

Chinese New Year Baking : Almond London Cookies

Chinese New Year is once again around the corner (February 8th)! For this year, I thought aside from the staple pineapple tart, I should try my hand at another favourite cookies for the festival. When I saw a recipe for Almond London Cookies during my blog surfing, I knew I want to make these. These did not originate from London and I have no idea why this cookies exists in Malaysia. The cookie is basically a toasted almond wrapped with short cookie dough, bake lightly, then dipped into melted chocolate and finish off with a sprinkle of chopped/nibbed almonds.

For step-by-step tutorial, please go to Nasi Lemak Lover.


Almond London Cookies
Source : Nasi Lemak Lover (linked above)


150g whole almonds

30g nibbed almonds


170g butter (salted)

60g icing sugar, sifted

20g egg yolk (used 1 yolk)

300g cake flour (used plain flour)


300g chocolate

Method

  1. Toast whole almonds in oven at 180°c for 13-15mins, and toast nibbed almonds at 180°c for 1-2mins. Set aside to let it cool completely before use.
  2. Cream butter and icing sugar till light and pale.
  3. Add in egg yolk, beat well to combine.
  4. Add in cake flour, mix until it come together to form soft dought. Do not over work it.
  5. To weight dough 6g each, wrap up a whole almond, and shape into oval shape.
  6. Bake cookies at 160°c (fan forced) for 15mins or until golden brown, set aside to cool completely.
  7. Melt chocolate over double boiler or microwave oven. Dip cookie in melted chocolate. Use a small fork, transfer coated cookie into a mini paper cup.
  8. Sprinkle some toasted nibbed almonds on top. Chill in the fridge (~10mins) to set the chocolate before storing in air-tight container. Store in cool place to prevent chocolate from melting.

Monday, September 28, 2015

Spiral moon cake

On mid-autumn festival, it is tradition to share and consume moon cakes for the Chinese and Vietnamese community. Different Chinese provinces have different types of moon cakes. For this year, I am attempting the Teochew spiral/swirl moon cake.
After 2 attempts at this spiral pastry technique, as you can see, it was unsuccessful. My oil dough was crumbly and I wasn't sure how to remedy it. Add more oil to bring it together? I'll definitely have to try to do a better job perfecting this technique by the next mid-autumn festival!

Notes:-
1) I am inserting the exact texts from both links as mentioned below for my own future reference.
2) I have halved the recipe for the dough which makes about 16 medium-size mooncakes
3) I have made the full custard recipe; which is sufficient.
4) To make egg custard filling ahead to let it cool before preparing the dough part.

Spiral moon cake
For the pastry (recipe via House of Annie )

Ingredients:
Water Dough (A)
200g unbleached all-purpose flour
28g icing sugar
pinch of salt
80g cold butter
80g water
Oil Dough (B)
180g unbleached all-purpose flour
pinch of salt
90g oil (I use canola)
½ tsp pandan essence (sub. with almond extract)

Method:
1. For the water dough, sift flour, sugar and salt. Then cut butter into flour mixture using fingertips or pastry blender until mixture resembles breadcrumbs. Add in water and mix to form a soft, non-sticky dough. If it is sticky, you will need to add a bit more flour to get it to be the right texture. You should be able to form a soft ball that won’t stick to your hands. You don’t have to knead it. Cover and set aside to rest for 20 mins.
2. For the oil dough, sift flour and salt. Then, make a well in the centre of the flour and add in oil and pandan essence. Draw in the flour from the sides and mix to form a soft even coloured dough (same thing here, if it’s too sticky, add more dough till you form a soft ball that doesn’t stick to your hands). Do not over-mix. Cover and set aside for 20 mins.

To assemble and bake:
3. Preheat oven to 185 C or 350 F.
4. Divide A and B into 10 equal balls.

5. Taking one piece of (A), flatten and wrap (B) in it. Pinch to seal edges.
6. With the sealed side facing up, roll into a rectangle.
7. Roll up like a snail to form a ‘cylinder’, turn the cylinder 90 degrees, with the end facing up.
8. Roll again into a long thin strip.
9. Using a sharp knife or a pastry cutter, cut the cylinder in the middle into two pieces.
10. With the cut side facing down, flatten the dough, making the edges slightly thinner than the centre. I tend to leave a little hump in the center so that when the filling is wrapped around the pastry, the dough will be evenly thick all around (looks like a Mexican sombrero).
11. Wrap the filling and pinch to seal. Try not to ‘tug/pull’ too hard, otherwise the layers will tear. Best to flatten the dough larger than smaller so it’s easier to pinch. And when you pinch, you will find that the bottom looks ugly—don’t worry about it.


For Egg Custard filling (via MaomaoMom)
3 extra large egg yolks,
½ cup sugar (105g)
1/3 cup+1 tbsp milk (88g)
3 tbsp all purpose flour (34g)
(B)
2.5 tbsp dry milk powder (14g)
2.5 tbsp butter (35g)

1) Place all ingredients (A) in a medium size microwave safe bowl, whisk well with a fork-
2) Add in the same bowl, all ingredients (B)
3) Place the bowl in the microwave , heat on high for 40 seconds. Stir the content and then heat for 30 seconds, reheat with 20 second intervals until fully cooked. Let it cool then divide into 12 equal portions. Form into balls with both palms then set aside and continue to start the mooncake dough

Saturday, August 29, 2015

Ang Ku Kuih { 紅龜粿 / Red tortoise cake }


Red Tortoise cake symbolises longevity in the Chinese culture. These soft and chewy red dumplings are therefore popularly served on the occasions of birthdays. To learn more, read the entry on wiki

Traditionally the distinct shape of this dumpling is achieved using wooden moulds;  of course, in this day and age, plastic moulds are available too.


And since I did not have the proper moulds, I have used my rose moulds for my cake (don't laugh :D)


Next, let's talk about the fillings. Most of the time these dumplings come with sweet mung beans paste. There are other varieties like sweet coconut and peanuts filling . etc.

Whatever the shapes, I am satisfied with the recipes used in making this cake. For my future reference I have included the recipes as follow :-

Ang Ku Kuih

Ingredients


Sweet Potato Dough
 
300gm sweet potato, sliced
200gm glutinous rice flour
1 tbsp rice flour
2 tbsp sugar
3 tbsp rice bran oil
180ml warm water 
Peanut filling 
via Peng's kitchen
 
150gm prepacked grounded peanuts (no salt, sugar added) 
1 tbsp toasted white sesame seeds 
50gm fine sugar 
1 tbsp oil 
2 tbsp water

Method
  1. Steam sweet potato until soft, for about 25 mins.
  2. Use a fork, mash the cooked sweet potatoes till smooth. Add in glutinous rice flour, rice flour, sugar and oil. Gradually add in water and knead till dough is smooth and pliable. Cover with damp cloth and rest for 30mins.
  3. Shape into 30gm small ball.
  4. Meanwhile, get the peanut filling ready by combining all ingredients in a mixing bowl and mix thoroughly. Mixture should not be crumbly and dry. Shape mixture into small balls weighing approx. 18gm each. 
  5. To shape dumpling
    1. Grease the mould  (for plastic mould) by brushing it with some rice bran oil.
    2. Flatten the sweet potato ball, place a piece of filling in the centre. Cover and seal the edge. Shape into a round ball.
    3. Place the ball into the mould, press down evenly, knock out and place on a greased banana leaf.
    4. Place the dumplings on a steaming tray and steam over medium heat for 10 mins. Turn off flame and grease the surface with some rice bran oil. 
     

Thursday, February 19, 2015

Steamed fish fillets, surimi with glass noodles

Happy Lunar New Year!
I have this carp fillets sitting in the freezer and since I'm unfamiliar with this fish, I was wondering what to cook with it. My thought process was, ok nothing too complicated like frying and too much effort since I'm not sure ..hahaa. So, let's just steam it in garlic, soy, shaosing wine and oil. Simple enough

Steamed carp fish fillets , surimi with glass noodles
Inspired by Thai steamed prawns like this one by The Woks of Life

Ingredients
350gm fish fillets
100gm glass noodles, soaked in warm water for 10-15 mins. until softened
Surimi sticks, imitation crab meat

seasoning
salt, to taste
2 cloves of garlic, chopped finely
oil for sauté
soy sauce, to taste
sugar, to taste
water, not too much
a dash of shaoxing wine (I've substitute with white wine)

Garnishing
Spring onions, green only
Coriander / Parsley leaves

Preparations:-
1) First prep. glass noodles as mentioned above. Set aside. You can do this in advance and keep in the fridge until you need it.
2) Start by heating water in your steamer. Meanwhile, on a plate, big enough for steamer. Lay the soaked glass noodles evenly. Then place the fish fillets/surimi sticks on top. Sprinkle salt over the fish, to taste
3) In a jar, mix together soy sauce, sugar, water and dash of shaoxing wine. Pour over the fish and glass noodles.
4) Sauté finely chopped garlic in oil, don't burn it.When ready pour all over fish and glass noodles.
5) When water is boiling in steamer, place the fish platter into steamer and steam for 10 mins. After 10 mins. check for doneness. If not continue to steam for another 5 and check again until it is ready.
6) Serve immediately garnished with spring onions and coriander/parsley.

Sunday, February 15, 2015

Homemade Yee Sang / Yusheng


To understand what this is all about , please visit wiki

Homemade Yee Sang / Yusheng

Ingredients
carrots, julienned
daikon, julienned (I've used local white radish)
cucumber, julienned
pomelo segments then into pieces (I've substitute with grapefruits) 
+ and other crispy vegetables to your liking
raw salmon (I've used smoked)
friend wonton skin (I've homemade based on this recipe by kitchen simplicity  )

Garnish
pinch of 5-spice powder
pince of white pepper


pickled Japanese ginger (I've made my own by shred ginger finely+water+brown sugar+salt+vinegar)

Salad dressing
Plum sauce (I've used apricot jam)
sesame oil
1 lime juice
pickling juice from ginger

Methods :-
1) Prep. the ingredients the vegetables and fruit. Put the prepped veg., pomelo, fried wonton skin and salmon in a bowl or arrange nicely on a plate. Sprinkle on the seasoning. Mix all the salad dressing ingredients together. Drizzle salad dressing all over the bowl/plate. Check seasoning, adjust if need to. Mix well and serve.

Saturday, September 06, 2014

Mixed Nuts Mookcake (need to let it sit for 2 days)


Pardon the indelicate looking mooncakes :D If you couldn't tell, they were supposed to be rose shape! For a while, it looked great until I egg-washed it and return it to the oven for the second bake.
Never mind the shape, because I am very happy with the results seeing that this is my first ever batch of baked mooncakes :) As highlighted in the title, after baking these need to sit for two days in a container before the date of serving.

As per usual, I've combined 2 recipes for this bake. Here are the links and I suggest you go direct to the links for detailed tutorials as the texts below are mainly for my future reference.

Mixed Nuts Mooncake

Ingredients

For the pastry
via Kirbie's Cravings

100 grams all purpose flour
60 grams golden syrup (I used Honey)
1/2 tsp alkaline water (forgotten to get this at the store, so I've mix a little water with baking soda)
28 grams vegetable oil
1 egg (for eggwash)

1. In a large bowl, mix the golden syrup, alkaline water and oil. Sift in the flour and stir until all ingredients mixed. Gently knead the dough with hands until it comes together. Cover bowl with plastic wrap and let dough rest for 40 minutes. *Note : 20 mins. into resting time, start pre-heating the oven at 180°c/350°F/Gas4.
2. Take 35 grams of dough, roll into a ball, then flatten with a rolling pin. Roll until dough is very thin and big enough to wrap around the 65 gram of filling. Take 65 gram of filling, make into a ball and put in the center of the dough. Wrap dough around the filling until it is a thin layer covering the entire filling, and seal dough around filling. You may need to roll and maneuver the dough a little to completely cover the filling. One side of your dough ball will be somewhat lumpy from connecting the ends together. The other side should be smooth.
3. Place mooncakes on a baking sheet lined with parchment paper or silpat mat, spacing about 2 inches apart. Bake for about 20-25 minutes. About five minutes before mooncakes are ready, remove and quickly brush the mooncake tops with egg wash. Place back in oven and bake until golden brown, about 5-10 minutes.
4. Let mooncakes cool. Place in container and let sit for about 2 days. This will allow the mooncake skin to soften and become darker and developer a shiny exterior from the oils being released.


For the filling
via youtube  Helena's Recipes

Ingredients (makes 4x200g cakes; or 10x100g, or 8x150g cakes)

*For the filling*
150g mixed nuts, roughly chopped
100g candied lime peel, roughly chopped
100g candied orange peel, roughly chopped
50g ginger jam
150g Chinese sausages, fat rendered and diced
4 tbsp sesame seeds
1 tsp sesame oil
3 tbsp cooked glutinous rice flour
3 tbsp simple/corn syrup

Since I couldn't exactly find all items listed in the filling above, mine consist of these :-

Monday, March 04, 2013

Pineapple Tart

recipe coming soon..I need recall which recipe and filling did I use..

update 28/01/2015 :- another post on pineapple "tarts" is up

Monday, March 01, 2010

Homemade Chinese Pork Jerky (Bak kwa) 肉乾

Wow! Homemade Pork jerky needs only 6 ingredients!
If you cook Asian food at home, my guess is you'd already have 5 of the 6 ingredients in your pantry.

The ingredients are :-
1.Ground pork 2.Light soy sauce 3.Dark soy sauce 4. Fish sauce 5. Cooking wine (I used white wine) 6.Sugar


For the exact recipe check at Little corner of Mine


Ingredients:
450gm minced meat, with some fats
1-1/2 tbsp fish sauce
1 tbsp dark soy sauce
1 tbsp light soy sauce
1 tbsp cooking wine
1/2 cup sugar


Method:
Pre-heat oven at 125°c.

Put minced meat in a big bowl. Add in the seasoning. Use Chopsticks and stir in one direction until minced meat becomes gluey.

Put some gluey minced meat on a *parchment paper. Cover with a big cling wrap (I think plastic sheet is better) and use a roller to roll the minced meat to 2mm thick. (*Do not use aluminum foil as it will stick!)

Put the parchment paper with minced meat, on a baking tray.

Bake in preheated oven at 125°c for 20 minutes. **After that, increase the temperature to 180°c and bake for about 20-30 minutes. Keep a close watch, as it burns easily at this stage.

Cooled and cut into pieces.
Jerky all stripped and ready to be devour! You may also make a sandwich with these meat garnish with cucumber

AddThis Social Bookmark Button

Wednesday, October 31, 2007

Howdy!

Say hi! to my bangkit bears :)

Yes, those cuties are kuih bangkit ; a type of chinese cookies made from tapioca flour. Auchan was having a chinese kitchen promotion and brought in lots of ingredients which normally not available on their shelves. We made a trip there last weekend so that I could finally stock sesame oil and hoisin sauce...woohoo! Then I was ecstatic when I saw tapioca flour!!! Got to have 'em , don't know what to do with them (never used it before *blush*) , but got to have it!

Next, of course the drill is to search for a recipe. Found quite a number of interesting use for the flour; however, I think the one from Little Corner Of Mine was the easiest, plus she had included useful tips to obtain the right texture for the cookies.

The tips work superbly! The slightly browned base gives a smokey (not burnt!) taste first when popped into the mouth and it just melts in the mouth ...mmmm . How fun to see the initially skinny bears gained weight (raised) after coming out of the oven :D


Sunday, July 01, 2007

Peanut cookies


Lately, all I could think about is food!! It doesnt help that there're so many food blogs offering easy recipes. Like this peanut cookies, preparation took me about 30 mins. only.
The first batch was burnt but guess what? I ate the not-too-burnt ones and I'm hooked! So, I baked it again the next day since it's doesnt require too many ingredients and its ready in a jiffy.

.
Verdict : One by one they melt in the mouth..oh, very addictive! You should really try it :)
.
Note : First trial the cookies weren't sweet enough. So, i've increased to 1/3 cup of sugar following the recipe of the link below
.
Peanuts cookies click here for recipe
source : Little corner of mine


(A)
1 1/3 cup unbleached all-purpose flour/ plain flour
1/2 tsp. baking powder
1/2 tsp. baking soda
(B)
1/4 cup sugar (or icing sugar for more melt in the mouth texture)
80g ground coarsed roasted/toasted peanuts
(C)
1/3 cup + 2 Tbp. canola oil

1 egg, beaten for egg wash

Method:

1. Sift (A) into a bowl.
2. Add (B), mix well.
3. Add (C), stir with a fork, the mixture will be crumbly.
4. Use your hands, scoop up the mixture and press it into balls. Place on parchment paper lined cookie sheet.
5. Glaze the peanut cookies with egg wash.
6. Bake at preheated 350'F oven for 20 minutes.